It’s no secret I’ve been having a great time hanging with the folks at MakeIt Labs in Nashua, NH. Many of the projects I’ve been working on have only been possible with their help and collaboration. Not in a “here lets do this for you” sense, but in providing a community where ideas can be bounced around, coupled with a physical space with every tool a geek could ever need at hand.
I’ve unofficially become the person organizing the parts supplies. These are ranks and ranks of bins that hold everything from capacitors to stepper motors to hot glue sticks to arcade pushbuttons. Understandably, these things can easily get out of control, so constant pruning and management is sort of a requirement. I can do that!

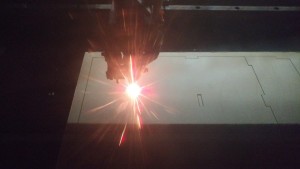
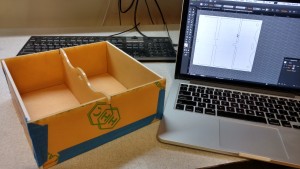
I had done some basic work on the laser, but this would be my first ‘build from scratch’. After measuring out the drawers, I decided to make a 9″square baseplate, with 4 sides, and a single divider down the middle that could easily be picked up. I used Adobe Illustrator to set where the cuts would be (Illustrator is great primarily because drawings measured in it translate perfectly to the laser cutter. No scaling / stretching problems. When I say ‘cut something 9″x9″‘, what I get is something 9″x9″.)
I manually did all the crenelations where the pieces would fit together. A fellow maker pointed out there’s software that helps do this, but for this first runthrough, I was okay doing it by hand. The material I was using is 1/8″ acrylic sheeting. Somewhere the lab picked up a metric buttload of the stuff, so we literally had dozens of square meters to work with.

It wasn’t all peaches and cream. I did mess up measurements on two of the tabs, and forgot to put in a cutoff for one small extension. After assembling what I’m referring to as the ‘1.0’ version, I realize there should be some changes. The central divider should tuck under the end pieces to give it better strength (it’s slotted in on the top now), and I should make a version of this that has 3 spaces in it, not just two. Tighter tolerances on the slots are needed (I measured 1/8″, but the ablation from the laser takes off a little bit more, so the slots are wider than they need to be).
Next step will be to re-do the cuts with the supporting tabs, remove the paper from the acrylic, and glue things together. If all goes well, I’ll have a nice insertable tray, and the ability to crank out many more without much work. Going full-on production of over a hundred of these trays will require an inventory of how much acrylic we have, and a decision on if we want to just pick up a few dozen sheets of 1/8″ birch (which would negate the ‘peeling off the paper’ problem).
I’ll post when there’s an updated sample. But for now… I played with lasers, and it was awesome.