My home automation projects has been churning along for over a year now. I’ve been able to set up motion detectors for stairway lights, LED strips for colorful lighting, and voice control integration through the whole house. Even my wife admits that having voice control in every room is convenient as heck.
We’ve gotten very used to the ability to turn on or off all the lights in an area, like saying “Downstairs lights off” which shuts off the 3 lamps in the living room as well as the kitchen and dining room lights.
But one thing that has been a steady thorn in my side is the difficulty setting up a wall mounted tablet to show the status of the lights, heating, and motion detectors, and allow you to turn things on and off via this panel.
Nowadays most folks use tablets – anything from an iPad down to the cheapest Android tablet you can find. They work fine, but for me the problem has always been power. The tablet needs to be turned on full time, and to do that, you need power. Running power to a spot in the middle of the wall is problematic and cumbersome. This is doubly irritating in that most tablets only require a simple USB cable to keep running.
The solution!
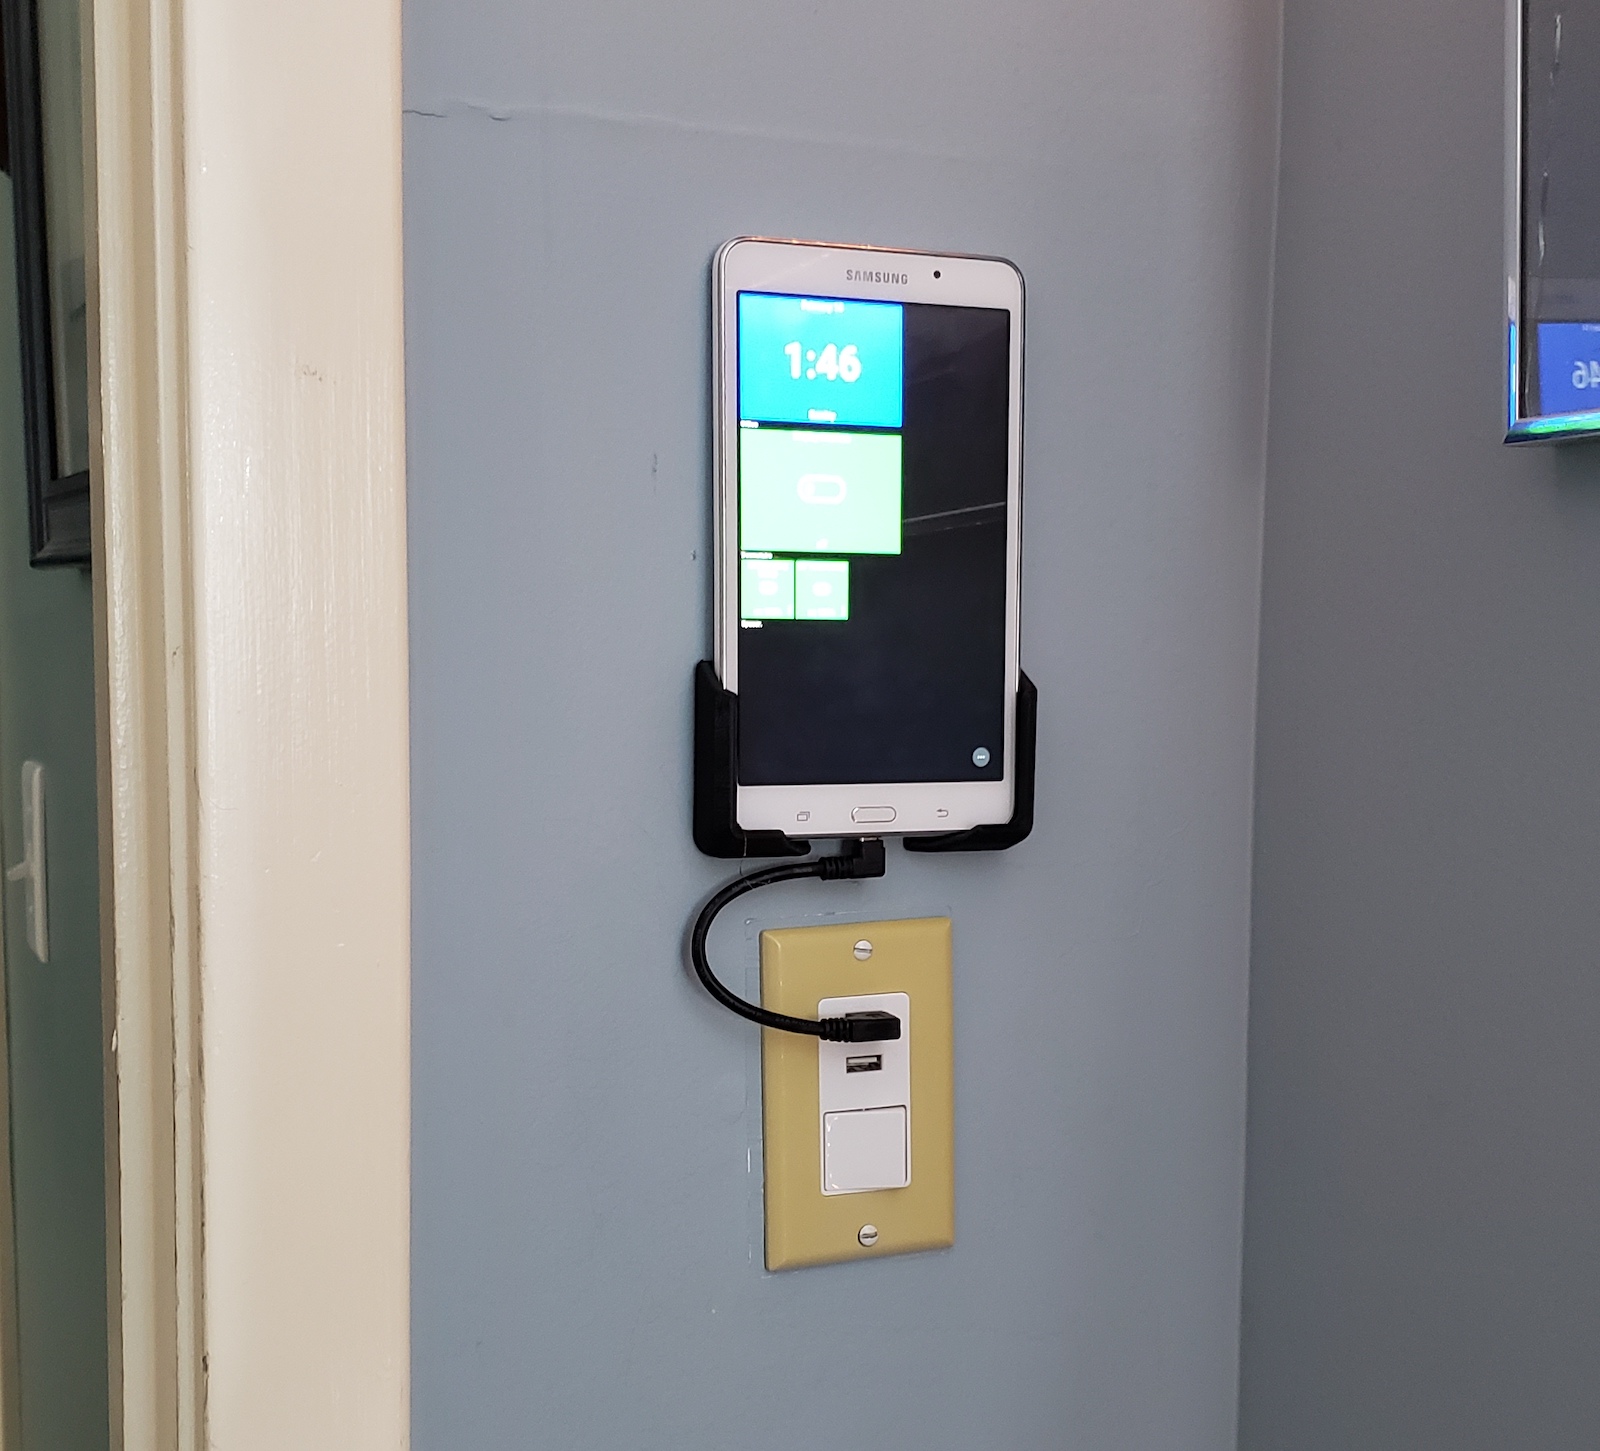
This lack of easy access to power has stalled my ‘tablet’ rollout for quite a while, until I found this combination USB port / lightswitch from Bryant Electric (model USBB102W). Using this plus a short jump cable, it seemed possible to mount the tablet just over the light switch. And lo, it was!
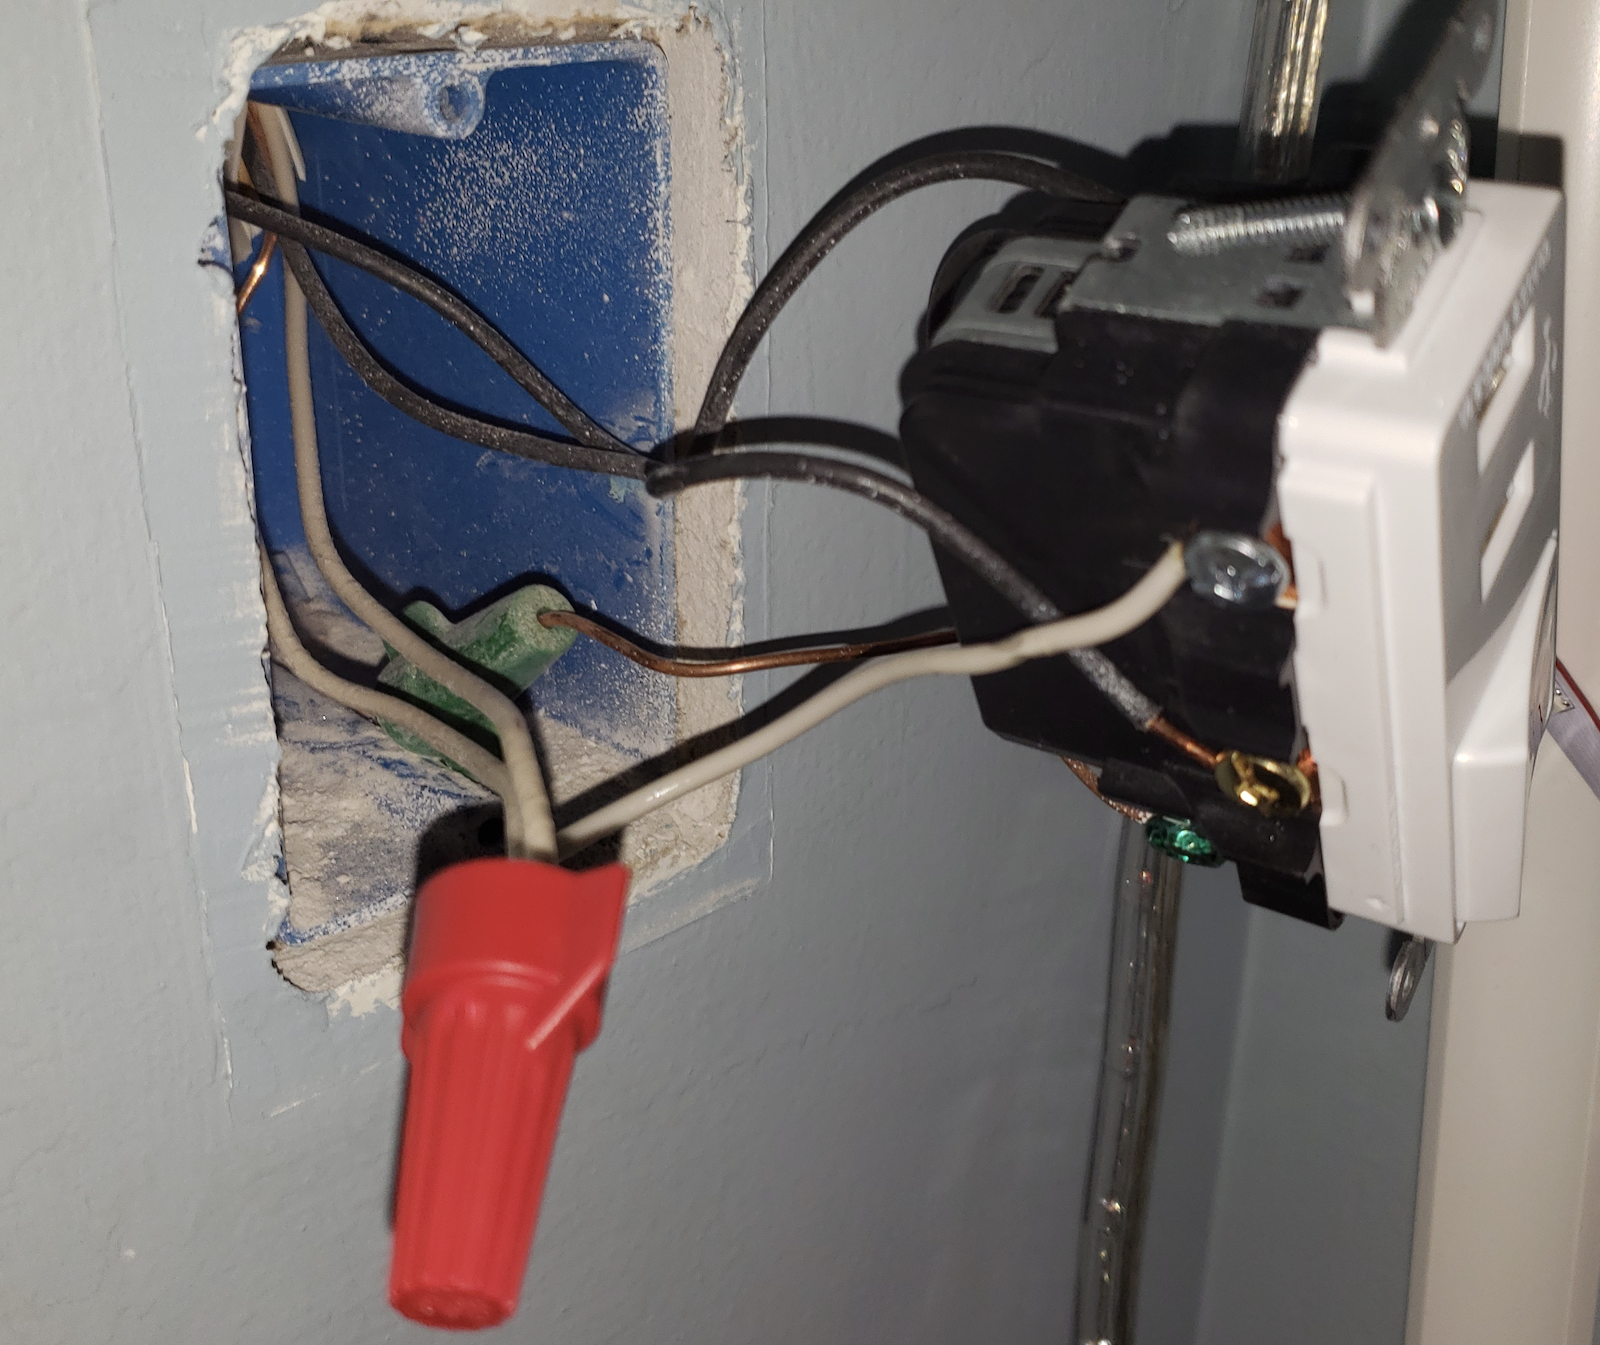
The lightswitch was a basic “interruptor” – it was wired with 2 black wires, plus a ground. The black wire is the “hot” feed to the ceiling fixture, so opening or closing the switch would open or close the circuit. Fortunately, the people who wired the house also had a neutral wire in there. It wasn’t wired to teh switch, but had a 6 way insertion connector, so it would be easy to wire it up.
Once I had the fitting apart, the wiring on the new USB enabled switch was a little confusing. Fortunately, I found a very nice post (on Amazon’s feedback page interestingly enough) that described how to wire it up:
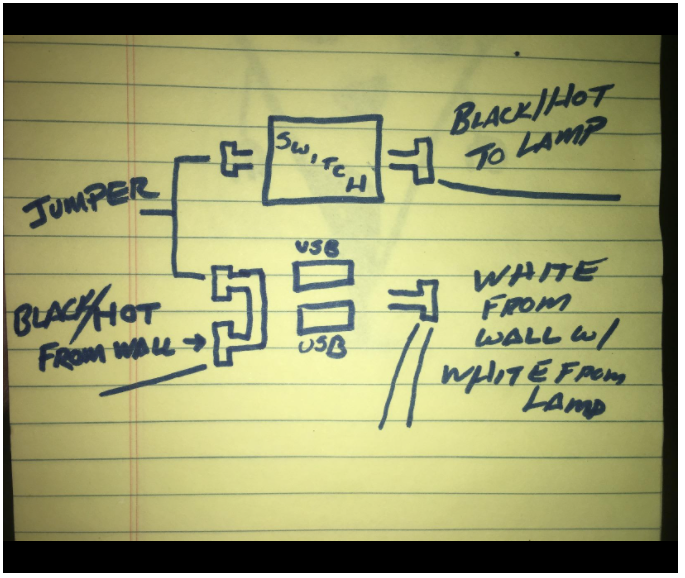
I was able to replace the press-in connector on the neutral lines with a wirenut, and used proper gauge for the jumper. Reset the breakers, and yay! Everything works!
Once I reassembled the switch and put a new plate on it, I was ready to mount the tablet. I’ve been using ActionTiles to control Smartthings connected devices, so putting that on the tablet was the goal. I ordered a couple short USB cables (making sure the orientation would work for the tablet), and then 3d printed some wall brackets for the tablet. A little VHB tape later, my tablet was mounted and working!
I enabled developer mode on the tablet, and set it to ‘never turn off while plugged in’, and my setup was complete!
So now what?
So where to next? Well, doing the Alexa integration with Smartthings is cumbersome (I’ll write this up at some point). I’ll need to solve this at some point – Alexa is just too useful to have, but the lack of a programmatic API for integrating display devices (like this one) with it is a problem (You can use a ‘kindle fire’ tablet for this, but the interface is not good, and ONLY controls Alexa devices :-/. Same problem, just in reverse.
I also want to add more items to the display board – like indicators about the status of my motion detectors, and possible a camera feed to the front porch. We’ll see!