It’s always a challenge to find things to do with a teenager just going through his first year at college. What could ye ole dad provide that more interesting than his new experiences with friends, classes and living away from home? So it was with some trepedation I reached out to Zach and asked if he’d be interested in taking a soldering class with me at MakeIt Labs, the makerspace I’ve been frequenting the last two years or so.
 The class was presented as a 3 hour introduction to soldering techniques and best practices. The lab would provide all the tools needed (soldering iron, tools, solder, and other bits), as well as the parts to build a nice little LED clock. This isn’t a ‘here’s your parts, you figure it out’ event, it was a guided walkthrough of basic technique, pitfalls to watch out for, and detailed instructions on assembly. Sounded like a great way to learn how to solder, as well as something we could do together.
“Sure Dad, sounds great. Lets go!”
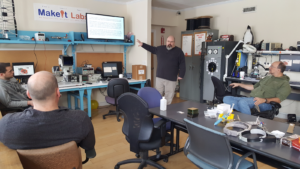
So I signed for the class, and on Saturday Zach and I headed up to the lab and settled in at our stations.
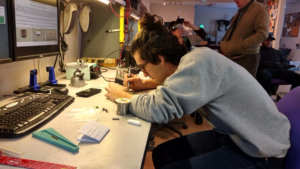
Each of us had our own kit, consisting of about 30 parts, a printed circuit board, red retro LED displays, and a powersupply. The workstations were well supplied with a very good soldering iron, solder, wire snips, flux, needlenose pliers, board holder, and other small tools. Zach and I, along with 6 or so other students, got started. I had some experience soldering, having done lots of drone builds that require a fair amount of soldering work, but nothing this detailed, and certainly not mounting components on a PCB. Zach had none at all.
Our instructor had prepared well, with a full presentation on what we were going to do, what tools we’d be working with, and basics of how to use the materials and follow the instructions. After a 15-20m introduction on the hazards we should be careful for (“Soldering irons are hot, mmkay? They make other things hot too. Be careful!”) we got started. The first couple components were dirt simple. Just jumper wires across the board. After that we moved on to more and more detailed things, culminating in mounting the socket for the CPU and installing the chip. Through it all, Bill, our instructor, was patient, detailed, and obviously an expert on the subject. He answered all questions professionally and patiently, and, along with lab assistant John, helped the students when problems came up, or simple inspected work to make sure it was going okay.
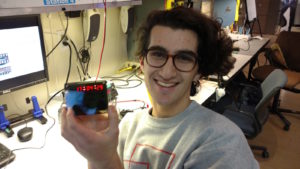
Finally, after 2 hours of assembly, we were ready to test the boards out. Bill used one of the lab bench power supplies, and one by one, each student brought their board up, and it got powered up. Zach’s worked on the first try, showing bright glowing red LED digits ticking away time perfectly. Mine, of course, didn’t, and we quickly discovered 3-4 bad solder points. I went back to my bench and fixed these, and my clock came to life as well.
The kits were from a standard hobbyist supplier, and were meant for student workshops like this. they didn’t come with mounting hardware, so before the class started, Bill and John thoughtfully used the labs laser cutter to make some acrylic display mounts. A couple screws, standoff posts, and acrylic plates later, and lo, we had a lovely, hand built, LED clock!
 The class was a great experience for both Zach and I, and we both had something useful we took away together. Each of us has an identical clock that we made at the same time, together, on a cold day in December.
Thanks MakeIt for providing a great learning environment, thanks Bill for putting together a great class, and thanks Zach for spending a cool day geeking out with his old man.
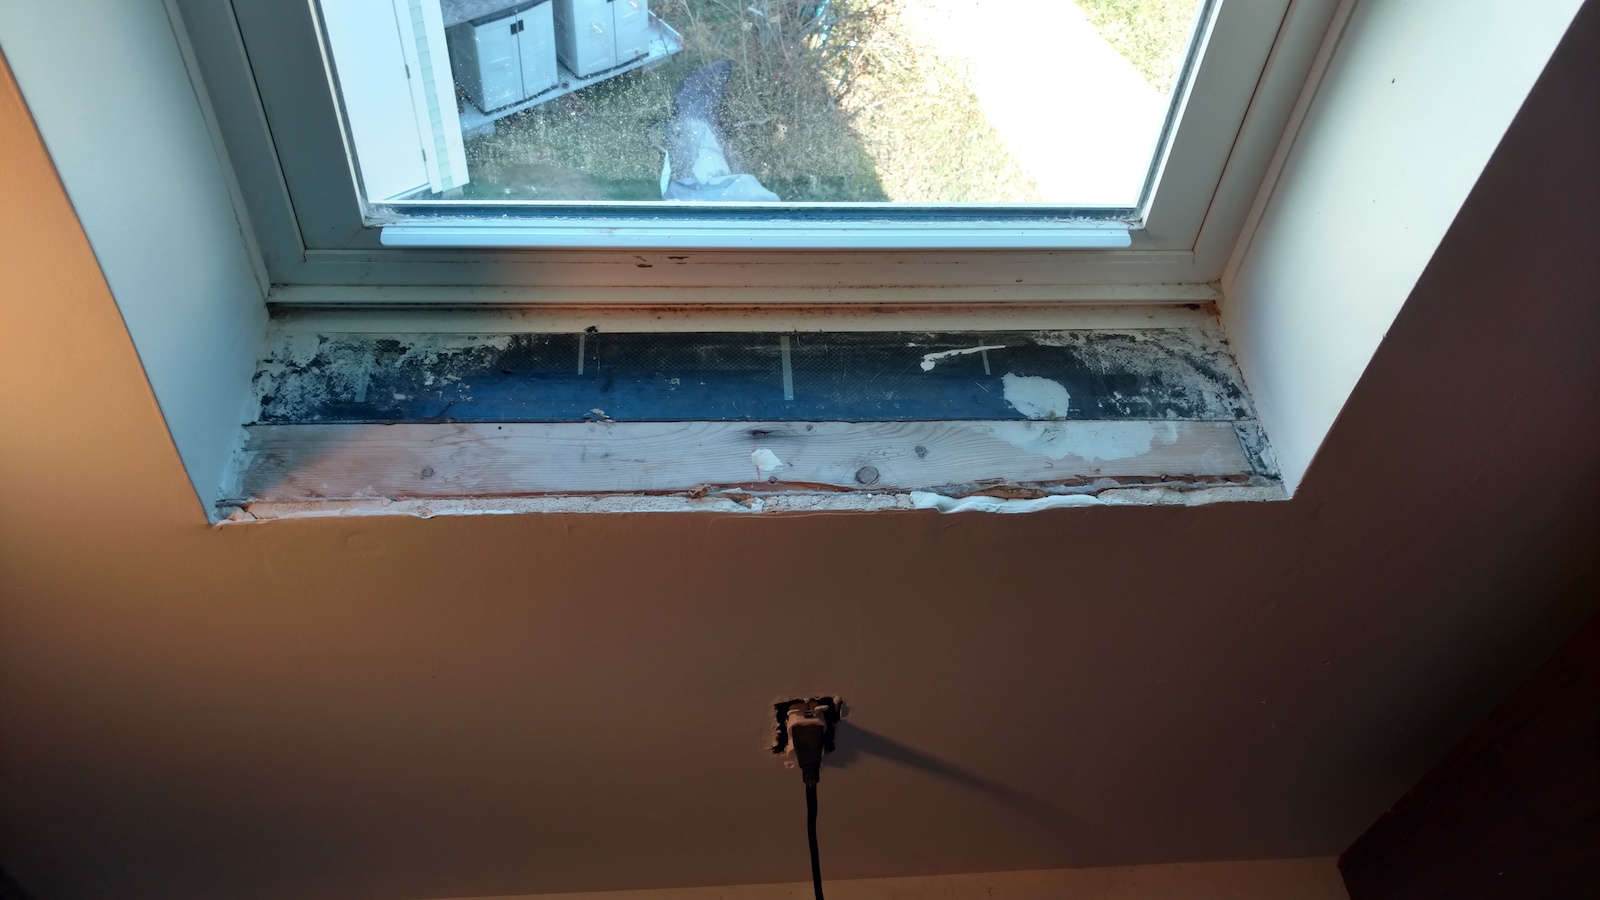 After finishing the attic, the windowsill on the one window was unfinished. I decided to do the work myself. It was an ugly and glaring flaw in the otherwise well finished space, it was time to fix it.
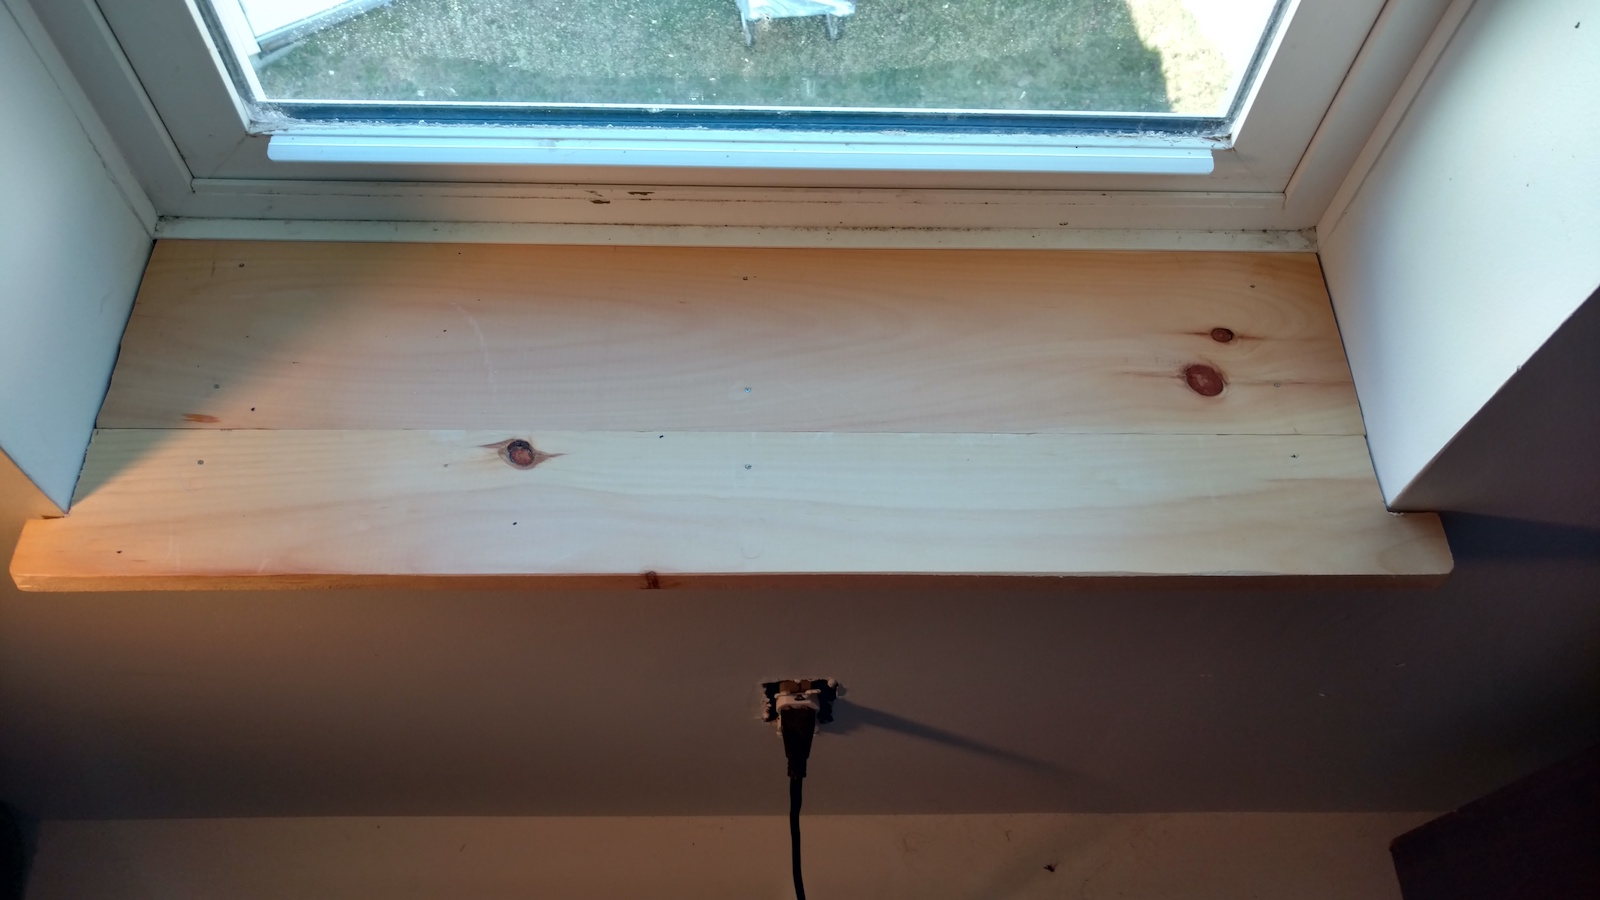 I used my belt sander to smooth / round off the edges of the lip and the nailed the pieces in place with finishing nails, using a small punch to countersink the nails so they wouldn’t stick up.
  Because the fit wasn’t perfect, and I hadn’t cut into the drywall to fit the pieces in snugly, I used some silicone to fill in the gaps and seal the wood against the wall. After that, it was just a matter of using some leftover paint I had from when the room was painted, and voila! I had a lovely new windowsill.