
Woodworking. Okay, great, another rabbit hole to go down, right? Well, sorta. Over the years I’ve learned to knock things together, how to saw, hammer, screw, paint, and assemble things out of wood, but I never really understood finishing. How to shape something creatively and come up with something beautiful at the end.
About a year ago I took a class up at Makeit Labs on the wood lathe. Lathes have always been fascinating to me, like potters wheels for wood. Take a primal material, spin it, and (in the case of a lathe) by removing material, shape it into something beautiful and smooth.
The class was great, and I learned the basics of turning. How to use a gouge, how to set up the spindles, and probably most importantly, what not to do to protect both myself and the equipment. I did a little turning after that and made a small parts holder for my work bench, but life stuff got in the way, and I didn’t do much else for a while.
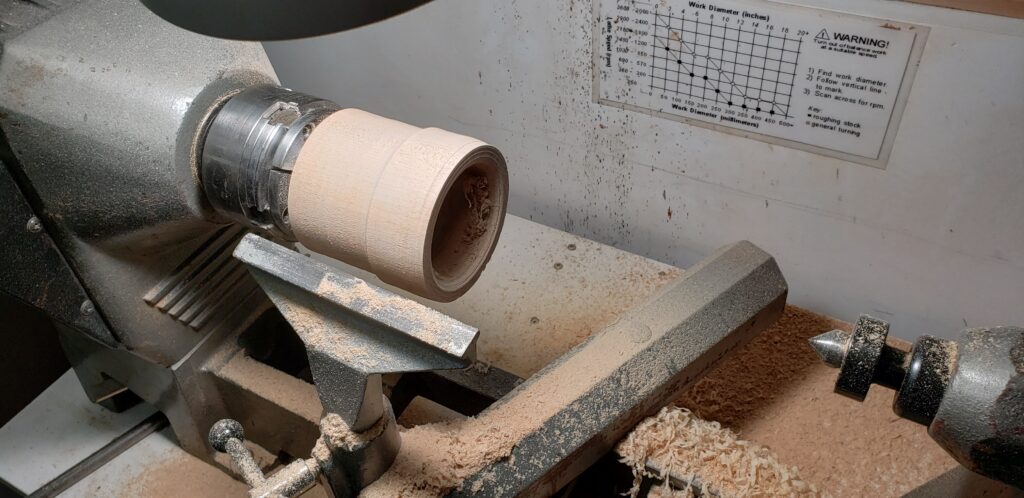
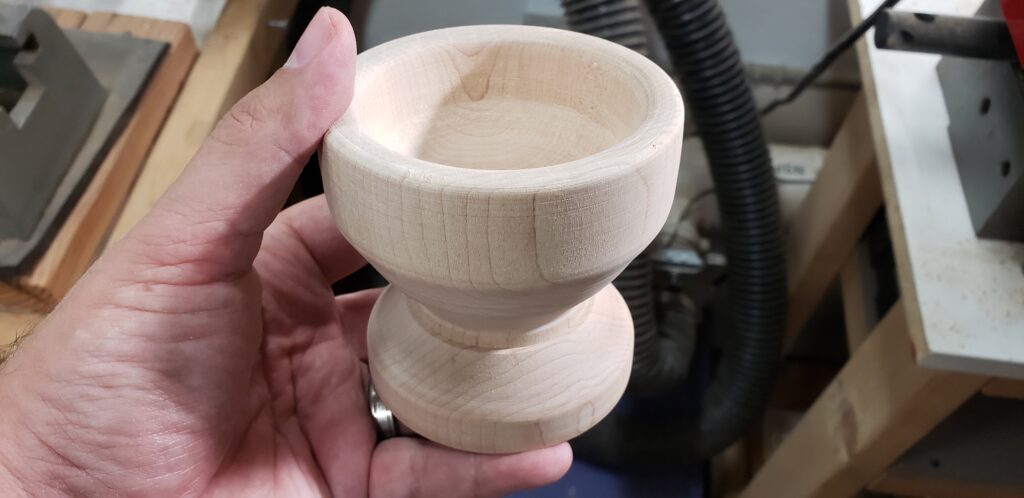
A few weeks ago things were shifting back to slight normalcy in my life, and I found myself with a few hours of free time up at the lab. When I first took the lathe course, I bought a box of sugar maple blanks, about 4″ wide and 5″ long. Maple is hard wood, but can be turned pretty easily. I decided to try and make a type of cup I’d like to use for hand lathered shaving cream. So it needed to be wide enough for the brush and also relatively waterproof. (Turns out after I did the shaping, the size I was using was too small, and making wood ‘waterproof’ is actually pretty hard, so this ended up just being a sample / test piece.)
The initial work took about 2 hours to get the shape down to what I wanted. It’s funny. Woodworkers learn this pretty fast, but it takes a while to sink in. The turning / shaping part of the process is the most rewarding and creative, but is the easiest / shortest part of the entire process. I could carve wood like this for hours, but I’d end up with a bunch of carved unfinished pieces. That’s not what I wanted to learn this time around, I wanted to take it to completion. So after the shaping was done, I took the piece home to start the finishing process
First of all, it needed to be stained. Some Minwax cherry stain was acquired. I took a sheet of 220 grit sandpaper to the entire piece, and sanded it smooth inside and out. Learning how to sand the inside of a cup without gouging it is a bit of a challenge, particularly when the opening is only 3″ across or so, but I was able to get it pretty smooth.
After putting on a set of latex gloves (this part I knew. Stain stains EVERYTHING – including hands!), I brushed on on the first stain, and the color jumped right out at me. Hey, I can see the grain! The instructions said I should smooth the stain on, let it sit for 15-20 minutes, then wipe off the excess. I did that, and the result was… good. Not earthshattering, but it was a mark above just a raw wood piece. I began to see problems working with a piece that was this shape… the stain tends to settle on places that were more horizontal, so the base had a darker look than the sides. I resolved on the next layer to make sure the areas that had less color would get more coverage.
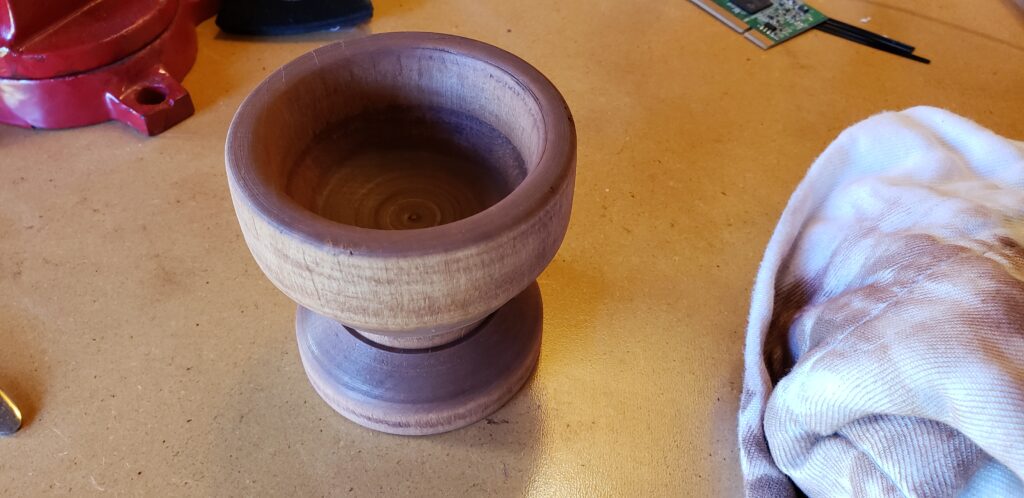
After a light sanding to help remove the excess on the flat areas, I stained it again, and the color was better, but still relatively dull. I mean, yeah, I can hear folks going “Duh, you’re not done yet” but I was hoping for a little glow from the coloring. Nope, not quite yet.
The last step was to put a few layers of polyurethane on. Now, this is a tricky topic, and I suspect major fistfights have broken out about how to this properly, what materials to use, etc. As this was my first piece, and I’m hoping to make things more water resistant in the future, I chose an oil-based clear poly coat. This should make it ‘okay’ for this to get wet, but I wouldn’t want for it to be holding buckets of water on a regular basis.
Poly cures slow, so I put on a single coat, waited until it had cured (about a day), sanded it with 220, wiped it clean, and put another coat on. The result is… good. I like it. It has a healthy glow and shine to it, and I can say “See this? I made this.”
So now what? I’m going to check around about how to do final polish / finish. Do I sand and buff the poly coat one more time? I think yes, but I need to check. Even if I stop now, I can put this on my shelf and go “I like this. I made it.”
I’ve since picked up a lathe I can use at home to do my own turning, so the next project hopefully will be entirely homegrown. Stay tuned!