Blog

Toshiba Libretto 110CT

When I was working at in the IT Department at Wildfire Communications, the number one toy the execs and managers wanted was  the Toshiba Libretto ‘palmtop’ computer. They ran Windows 95, were compact and functional (for the time), and made great conversation / showoff pieces. I had to have one for my collection.
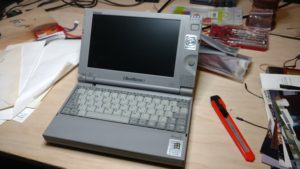
I’ve let people know I was collecting vintage handheld computers, suddenly everyone wanted to donate! I quickly put together the collection home page and made the wishlist known. Lo, a friend I know from Arisia said “I have a Libretto that’s just lying around. Want it?” – Heck yeah!

This weekend, it arrived via a somewhat circuitous route, and lo, it is a 110CT – a slightly later model than the ones I worked on (which were 50CT and 70CT’s), but still the same form factor and awesome design. One of the niftiest is the integrated touch-mouse on the right side of the screen.  The mouse buttons are actually on the lid, so you move the mouse with your thumb, and grip the buttons on the reverse side.

This one appears to have a screen problem that won’t let it show video properly, but I’m excited to have it in the collection. Thanks Ben!

For the curious, here’s the specs on the 110CT:

  • Manufacture date: 1998
  • Pentium 233MMX CPU
  • 32meg RAM (!!)
  • 4.3GB HD
  • 7.1″ 800×480 display
  • Came with Windows 98 or Windows NT

UPDATE 10/3 – Blank screen on startup / video problem solved

I finally googled around long enough to find the problem.  The Libretto shows an absolutely blank screen until any boot device is ready.  I noted that if I held down F12 on startup, I’d get the BIOS update screen, so the screen worked, the problem was elsewhere.  While on the BIOS screen, I heard a very light noise – and realized it was the HD trying to spin up, but failing.  This is not an uncommon problem in older computers.  The drives get ‘stuck’ and can’t spin up after sitting for a while.  Sometimes referred to ‘stiction’.

There’s only one cure for stiction.  A vigorous shake of the computer, or… yes, I really did this, rap the laptop on the table a few times.  For a book-sized computer, this was easy.  A few taps, and I heard the hard drive happily spin up, and lo! A windows 98 screen appeared!  We’re in business!

Handheld Retrocomputing Collection and Display

Okay, so everyone loves retrocomputing stuff.  Looking at a piece of equipment or an item and going “Gosh I remember using one of those ${back_in_some_day}.” Well, I finally decided to formalize my collection a bit, and set some goals for myself.

I’ve decided to focus on handheld computing devices that had a significant impact on the industry, or I have a special emotional connection with.  Handhelds in particularly are attractive because, well, I don’t have a lot of space.  So while I’m sorely tempted to collect Apple II’s, old CP/M machines, and DEC minicomputers, living in an 800sq ft townhouse makes that a practical impossibility.

So I’ve focused on handhelds.

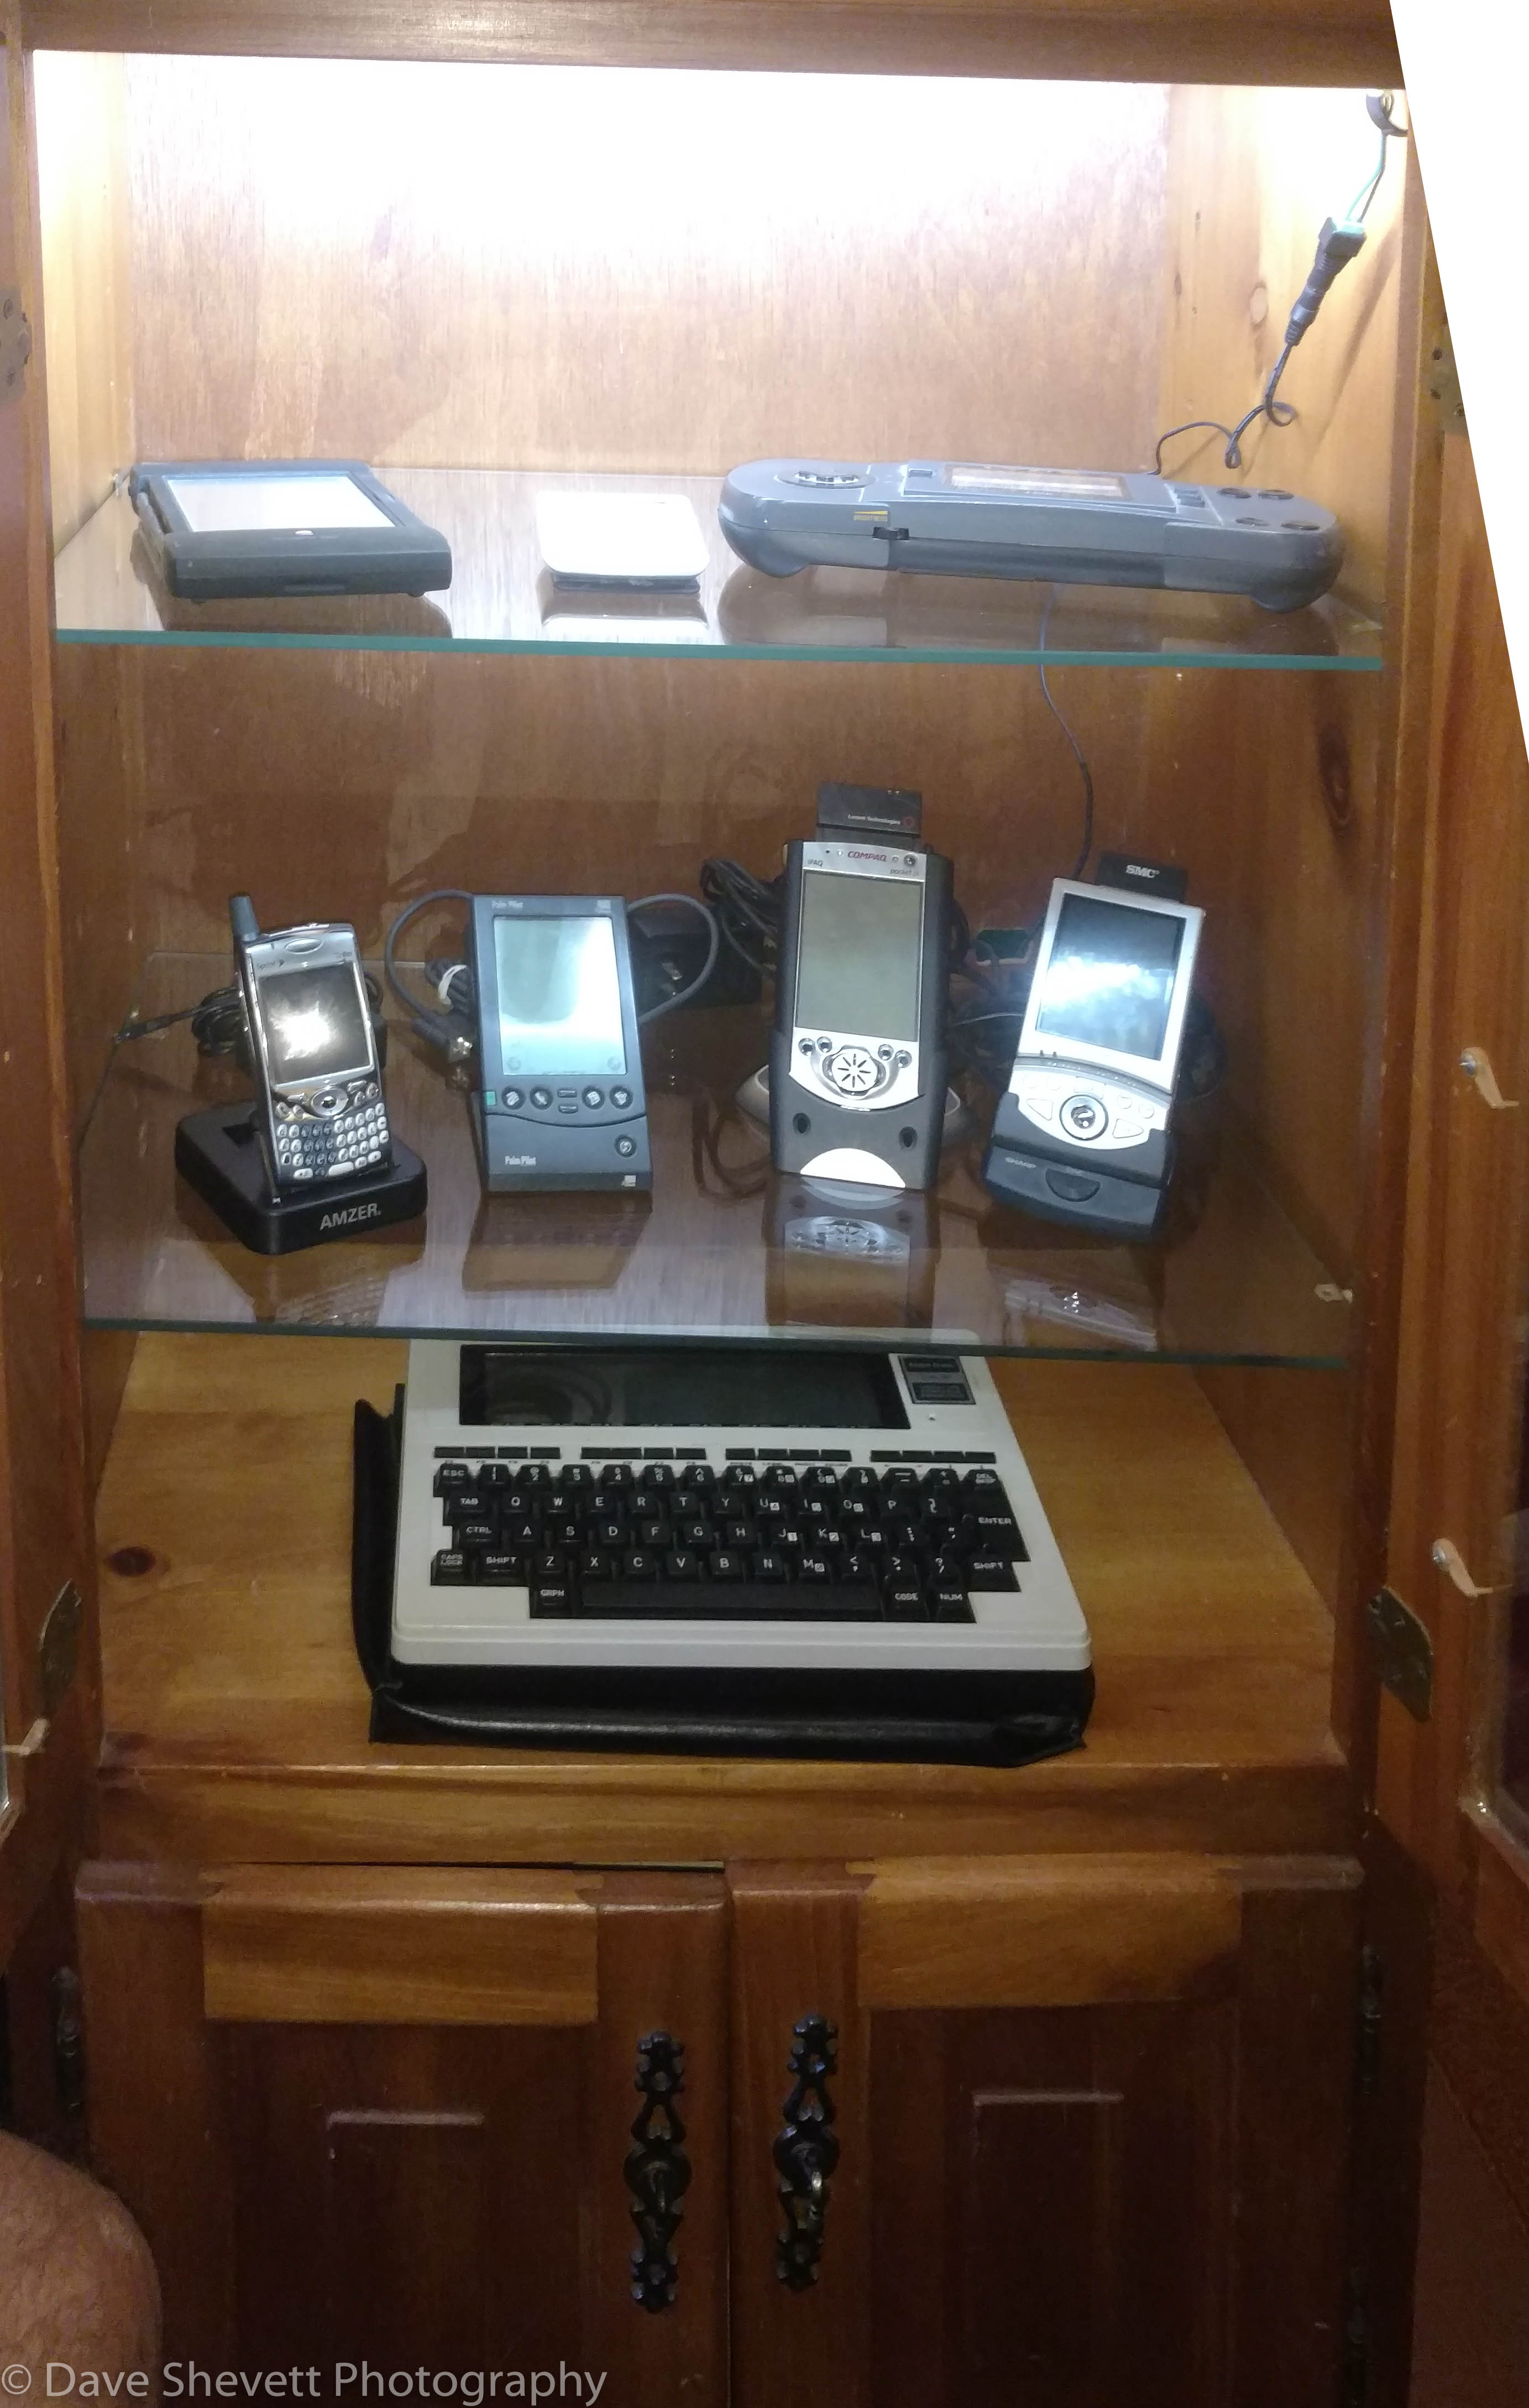
It became quickly apparent that I’d need a place to store and display them.  My partner had a glass fronted wooden display case that was a good starting place.  It had a storage space underneath it for boxes and cables, and nice glass windows on the front.  I had some custom glass shelves made to replace the wooden interior shelving, and installed some LED lighting across the top.  With everything done, I was able to put all the things I had (so far!) into it, and it doesn’t look too bad!. (Here’s what it looks like with the doors closed.)

Many of these were items I already owned, but I’ve fleshed things out a bit with finds from eBay and other auction sites.  So far, here’s what I have.  All items work, and have functional batteries, except where noted.

  • Apple Newton Messagepad 2000.  (1995)
  • Palm Zire M150 (2002)
  • Atari Lynx (1989)
  • Palm Treo 750 (Sprint) (2006)
  • PalmPilot (1996)
  • Compaq IPAQ (2000)
  • Sharp Zaurus 5500 (2002)
  • Radio Shack TRS-80 Model 100 (1983)

I hope to expand the collection going forward.  Here’s my current wishlist:

  • Atari Portfolio (first palmtop computer running DOS!)
  • Newton Messagepad 2100 (the best of the breed, and the equivelent of the unit I used to have)
  • Apple eMate 300 (This is pushing the bounds of a ‘handheld’, but they’re amazingly cool devices regardless)
  • Toshiba Libretto (I used these when i worked at Wildfire, and remember them fondly)
  • IBM Simon – This was the first real ‘smartphone’.  I used one for a while, and ended up either giving it away or selling it.  They’re scary rare now, I’m kicking myself for tossing it.

If I do end up getting these things, I may need to expand my cabinet.  But right now, I’m pretty happy with what I’ve got.

Update: I now have a page specifically for the collection.

A Weekend in Salem

The last couple weeks has been pretty stressy and work-focused, so Mariama and I decided to take a weekend off and go visiting someplace new.  We’re trying to expand our destinations a bit and avoid the trap of “lets go someplace comfortable and known…” – we hope to travel abroad in the future, and always going back to places you know isn’t gonna mesh too well when we’re travelling in new countries and strange places.

So this weekend we settled on visiting Salem, MA – I’d been here once a long time ago (we’re talking 15+ years, while managing a toddler), but really hadn’t looked around much.  This time we planned on exploring, biking, and walking as much as time allowed.

Because I booked things so late, our options for hotel stays wasn’t that wide, but I ended up booking a room with the Salem Inn, right in the middle of town.  We ended up in one of their ‘satellite’ houses, about a block away, called Curwen House.  Think early 1800’s colonial manor house and you’re not far off.  It was well apportioned, comfortable, and had free breakfasts each day (which was really good).  My only gripe was the air conditioning was stuck on HIGH all weekend, so we were a bit chilled.

Friday night we walked around town a little – we seem to be in mid/off season.  It wasn’t crowded, but it wasn’t dead.  It was cool without being chilly.  Pretty much perfect timing for exploring.

Saturday we got up early, had breakfast, and biked out to Marblehead.  This was our first ‘long’ ride in quite a while – things just have gotten in the way, and we haven’t been on the bikes nearly enough.  We rode about 9 miles total, out to marblehead, then down to the beach (Hello ocean!), and back to town.  We got back good and tired, but rather than fall into bed, we decided to go get a lateish lunch.  A really good restaurant called Bonchon was our destination (think upscale Korean fried chicken), which was delightful.  We were sort of energized after lunch, so decided to do more foot exploring.  Originally we had hoped to visit the Peabody Essex Museum (which had a series of exhibits that sounded great.  Ocean Liners, Movie Monsters, and some other nifty things going on), but the weather was so nice, and there were so many ‘little’ places we wanted to see, we decided to just walk and explore.

Saturday night we were initially going to go a very nice italian restaurant, but ended up at a place called Bambolina (which we found on Yelp).  It was wonderful!  This is absolutely not your neighborhood pizza joint.  We had fantastic appetizers and a hand made pizza (which was made right in front of us) that was outstanding.  Highly recommended!

Salem is an interesting town.  Naturally, it’s best known for the whole witch thing, and it’s hard to get away from it.  It’s the source of 90% of their tourist industry I suspect.  But the town isn’t particularly ‘high brow’ as many Massachusetts coastal towns are.  There’s definitely money to be found (particulary out on the coast near Marblehead and Swampscott), but a good portion of the town is fairly middle class.  It was interesting going from the touristy strip on Essex street and after a block passing homeless folks and loud Irish bars, then jumping right into restored 19th century homes.

Some takeaways…

  • This is a great place to visit that’s not far away from home (about an hour and 15 minutes) to get away for a weekend.
  • The restaurant scene is remarkably good.  Even though we only stopped in 2 places for meals, I could see spending time figuring out all the nifty places in the town.
  • The Salem waterfront is a big bay, so there’s not a lot of feel of ‘being on the ocean’ unless you go north or south a bit on the shore.  Having said that, there’s a huge marina and maritime museum right in town.
  • If you have an interest in early-mid 1800’s history, this is the place to be  The place is drenched in it.  Buildings, families, stories, monuments – they’re all here.

Will we come back?  I think so, yes.  As I said, it’s not far away, and with a little juggling, I think we could find lodging that’s comfortable and not very expensive.  Everything is within walking distance, and biking is very easy and gives you access to a lot of the area.

Living in the Future

Today, while hanging out at home, I realized I was out of coffee. Being part of the Keurig Nation, I happily order San Francisco Bay One Cups on a regular basis (these cups have far less plastic than the standard K-Cups, and the coffee is delicious).

As I was reaching for my laptop to order some more, I remembered that Alexa is supposed to be able to do online ordering. So….

“Alexa”
(bading)
“Order more coffee”
“According to your order history, I found two matching items. The first is San Francisco Bay One Cups, 60 count. it is $31. Would you like to buy it?”
“Yes”
“Okay, ordered. It will be delivered Sunday August 6th”

Aaaand done. I checked the order history later on, and sure enough, there it was.

I did make a note to my partner, who was listening to this interchange.

“So, that’s pretty cool. Um, so, please don’t ever do that when the nine year old is around.”
“Hm? Wh… oh.”
“Alexa, order a pony!”

Etc.

Charging Multiple Lithium-Polymer (Lipo) Batteries at once

As any quadcopter / drone pilot knows, the more batteries you have on hand, the longer you can stay out doing what you love – flying! Unfortunately, this comes at a price, and no I don’t mean the cost of the batteries. Those puppies need to be recharged before you can get up in the air again.

When the sport started, many people had single chargers – a single power source that could charge one battery at a time. That didn’t last long, and gang / parallel chargers became the norm for active pilots.

But charging batteries in this way needs a little math. And since I spent this morning doing it the WRONG way, lets quickly go over the RIGHT way to do this.

The components

First, lets review the pieces.

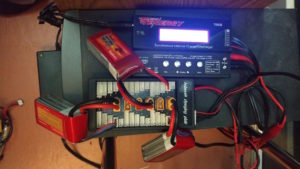
  • A power supply. The juice has to come from somewhere. I’m working with 3S batteries, which run at 12v so my PS needs to match that. Tenergy sold a very nice little power supply with the charge controller I use. The most important thing to note on the PS is it’s rating. Mine is 5000ma (5 amps). I can’t draw more current than that. Remember this later.
  • A Balancing Charger. I use a Tenergy TP6-B charger, which has served me super-well.
  • A balance charging board. There’s zillions of these out there, ranging in quality all over the map. They’re pretty simple devices. Looks like Crazepony has a decent one that includes fuses. I picked up a cheap chinese version a year or two ago.
  • Batteries (duh). What sort of batteries you use is completely up to you. When doing gang charging, they have to be the same voltage (2s, 3s, 4s, whatever), and relatively close in their C ratings and capacity. In this article I’m using Floureon 1500mAh 35C batteries, which are pretty low-end in the current world (new 4S batteries are on the way!)
  • A charging bag. This is for your own safety and the safety of your house, but it’s a good idea no matter how you slice it. I use a bag most of the time, though the photos below do not show it.

Great, but, what amps to use?

And thus the question is asked. When using a balancing charger like the Tenergy, there’s several menu options for how many amps to charge with. The general rule of thumb is you should charge your LiPo batteries at ‘1C’, meaning putting the amps into the battery that matches it’s capacity. For my batteries, they have a capacity of 1500mah, so I should charge them at 1.5A. Easy, huh?

Balance Charger

Now we start talking about parallel charging, where you’re charging more than one battery at a time. They are hooked up in parallel (so in essence look like one big battery to the charger), so when calculating what amperage to use, just add up all the capacities.

BUT! (there’s always a but, huh?) – whatever power supply you’re using can only provide so much current. Look on the power supply and you’ll see something like “Maximum 12v 5000mah” (or might just say ‘5A’). That’s the maximum current the power supply can crank out. You should never set up your charger to draw more than that value. It may work, but you’ll be stressing your power supply and could over heat / damage it.

So, given all this, with my power supply rated at 5000mah, and I’m working with 1500mah batteries, I can charge 3 batteries at a time. I set the charger to provide 4.5A power at 12v, plug my batteries (and the balance plugs) into the board, and hit go!

So what did I screw up?

Well, somewhere along the line, I had forgotten the basic math above, and have been charging only 2 batteries at 1.5A. Which, as you can imagine, takes something like an hour and a half per charge. Somehow I got the cobwebs out of my brain and remembered the math, and just recharged 3 1500mah batteries in 45 minutes.

MUUUCH better.

I have a Smartwatch, and I’m not sure why

Smartwatches. They’re the new cool toy for geeks. Having a small mainframe on your wrist sounds pretty nifty. But has the time come for everyone to strap a mini-cray to an appendage? I’m honestly not sure.

I’d been resisting jumping onto the smartwatch bandwagon for a long time. When Pebble proved that there was a demand for the gadgets, I watched with interest, but the device didn’t seem polished enough to be worth the expense. So I waited.

Then the Apple Watch came along, and I was still underwhelmed. Super expensive, and because I no longer used an iPhone, not really helpful to me.

Then Android Wear happened, and I began to take an interest.

The first generation of smartwatches was pretty limited. Low battery life, poor performance, clunky look. I wasn’t feeling the buzz, but I could see there was potential there. Then Android Wear 2.0 was announced, and I realized my time was near.

The amount of time I was spending looking at my phone was reaching criticality. I needed a way to be able to be notified about meetings and messages, without having to haul out the damned black slab everytime. And, lets be honest, I like knowing what time it is. So yes, one of the reasons I wanted a smartwatch was I wanted to use it… as a watch.

My employer has a great perk in that you get an allowance each year to spend on health related items. A gym membership, a yoga class, or… a smartwatch, for helping track activities. Given this final nudge, I decided it was time.

Now the next step is to choose which one. I knew I wanted Android Wear 2.0 compatible devices, and also wanted something that didn’t look completely dorky. I have an advantage in that I have big hands, so most of the watches would look just fine next to my meaty paws.

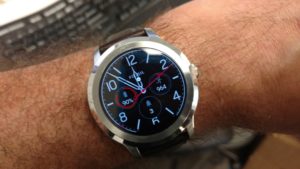
I settled on the Fossil Q Founder Gen 2. I liked the looks, the price was reasonable, and it was Android Wear 2.0 compatable. The styling was quasi-retro, in that it had a light brown leather strap, stainless steel case, and classic lines. Amazon click, and it was on its way.

First impressions

I like it. I find it attractive, comfortable, and useful. It is a very good watch. I love that I can customize the watch display to show me other small tidbits of information. Temperature, how many messages I have waiting, how many steps I’ve taken today, battery level, etc. They are all available at a glance, with the display going into a simpler mode when the watch face is not turned toward me, thus saving battery life.

Fossil Q Smartwatch Gen 2

I’ve always been a sucker for geeky watches. I totally had a Casio Databank when I was a kid, and later moved up to good backpacking / hiking watches for backcountry stuff, but this is in a league of it’s own. This is a machine with 4gig of storage, a gig of RAM, and a 64bit 2.1ghz CPU with 3d graphics capability. Those are specs you’d see on a desktop machine from a couple years ago, all on a computer that lives on your wrist.

So, how’s it work?

Eh

I have to say, it’s… okay. Don’t get me wrong, it’s an excellent watch. It tells time, shows me some basic information that I need to have quick access to, but… I’m not blown away by it’s utility. I find the act of staring at it, manipulating menus or scrolling through options, or using a swype-like interface to write a text message tedious and awkward. If I’m going to do any of that, I might as well pull out my phone, which I have to have with me at all times anyway, because the watch basically functions as an extension of the phone. At this, it excels. If I find a function doesn’t work or is unavailable on the watch, I can whip out the phone and get things done.

So where does this leave us on the plusses or minuses of a smartwatch? Unfortunately, it’s still in a gray area. As a geeky watch, I think they’re cool and nice looking and work. As a logical extension of the phone in a new and useful way, I think there’s a long way to go.

Repairing Drone XT60 Power Connectors

A quicky post here. I took about a year and a half off drone racing, and I’m just getting back into it for a bit. What has happened during that time is that the community has moved onto to faster, smaller drones. At the moment all I have is my 250mm QAV250 clone, so keeping that flying until I build a new machine is what’s keeping me busy.

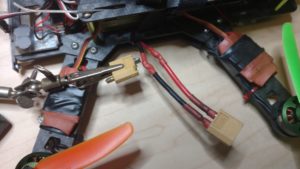
The damaged XT60

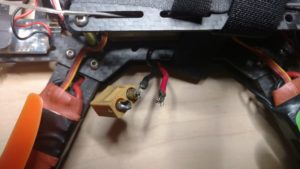
I went out to fly yesterday with some folks in Waltham, but before I could power up, I noticed my XT60 connector had broken loose on the positive lead. Bad news. That’s not something I can fix in the field. No flying for me!.
Tonight I sat down to repair the power connector, but realized I didn’t have any spares. I tried to reuse an old connector, and… well, melted it into goo. (that’s what’s int he alligator clips in the picture below). I had one other one, and managed to desolder and solder in the new connection without too much damage. I am sort of proud of the fact that I was able to reconnect the power leads, and add 3″ of extra silicone insulated feed wire, and get my shrink tubing in place without much chaos.

All fixed and insulated properly.

Tomorrow I should be able to fly with the MultiGP folks up in Derry, but I know my time with the 250 is coming to an end. I have a new frame and motor and battery setup in mind, but more on that when things get closer. For now, things are packed up and ready to go flying tomorrow!

Miner 2149 – A 17 year old PalmOS game on Android

It’s no surprise that I’m a big fan of retrocomputing, and the associated fun times of retrogaming. Call it being stuck in the past, an over attraction to nostalgia, whatever, but playing around with older stuff can be fun.

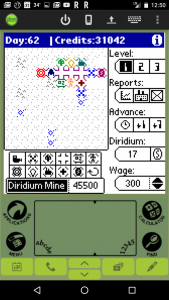
Miner 2149 on Android
I got a hankering to play one of my favorite PalmOS games “Miner 2149” recently. Normally when you do retrogaming, it takes some serious tinkering to get everything in place. But lo, I carry around an extremely powerful multicore computer in my pocket all the time. My Motorola Moto-X Pure. I could probably use that…

And lo, it happened.

The first step was downloading PHEM, a PalmOS emulator for Android. This installed without a hitch. Next was getting a ROM. This is a little tricky, as PalmOS roms are technically copyrighted by whomever owns the PalmOS IP, so downloading them isn’t straightforward. I mean, where could you possibly look to find a file called “Palm OS 3.5-en-color.rom” – but somehow I managed to find a ROM.

Second step was to find the Miner 2149 prc file. These are usually found in zip files of the same name. See previous paragraph for comments thoughts on locating something like this.

Installing prc files into the PHEM emulator takes a moment to figure out, but it’s basically fooling the Sync function in PalmOS to accept a downloaded file as a sync source via the “upload” button at the top of the screen.

Once that’s completed, it’s just a matter of tapping on the Miner 2149 icon in the emulator, and voila! Instant nostalgia!

The game really is as fun as I remember it. I spent about 2 days (okay, evenings… I work for a living) playing it. The first game (pictured above) didn’t end well. Second one went to… well, gosh, this game doesn’t actually have an ‘end’ or win condition that I can tell. I mined every mine and was profitable. At some point I had hoped the game would go “You won!” but that time never came.

Now to dig up some other oldies but goodies. Suggestions are welcome!

Using Amazon Kindle Fire HD’s as Registration Terminals

Even though I’m not working on CONGO as much anymore, I’m still helping out with registration at a couple events, and I’m always looking for better tools and gear to use. I originally designed registration to use cheap, network bootable PC’s, but that was so 15 years ago. The new hotness are small, inexpensive tablets. So could you put together a registration environment using some cheap tablets? Sure.

I’m helping an event that’s using EventBrite for registration services. I’d helped out at a different event about a year ago, and was impressed with the tools Eventbrite offered. The best part was the Eventbrite Organizer, a mobile app for IOS and Android that basically gave you a live dashboard, but also allowed super-fast checkins using a QR code scan. Think of scanning a boarding pass when boarding an airplane. The process is very similar.

The only drawback was, I needed a series of tablets that were roughly the same (bringing batches of workstations that are all different is a sure way to headaches). I didn’t think buying a stack of iPads was going to make sense, and el cheapo tablets from ebay and amazon are sketchy.

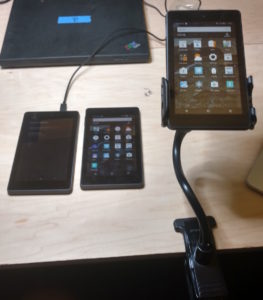
3 Kindle Fires being configured as registration terminals
I saw a deal come across Woot for Amazon Fire HD 7″ Tablets for… $33. Each. After digging around on the net, it looked like it was possible to load non-amazon software on these, it just took a little bit of jiggling. I’ve rooted Android tablets before, but it’s not a pleasant experience. I was seeing documentation that allowed for the Play store to be activated without a lot of yak shaving, so I decided to go all in.

I ordered 3 of the tablets, and they arrived a few days later.

First impressions – these are really nice. The design and polish is excellent, they fit well in the hand, and have exceptional screens. They have excellent battery life, and front and rear facing cameras. For $33, there’s not much to go wrong with here.

Here’s the steps I went through to get them up to ‘useable’ status.

  • First, charge them up, natch. They have great batteries, and the entire upgrade process and installation can happen on battery, but really, just get ’em charged.
  • Next, power up and log into your Amazon account. All the Fires have to be tied to an amazon login. Using the same one on each is fine (Amazon supports many Kindles per account).
  • Continuously go into the System settings (swipe down from the top) and select Device Information -> System Update. There’s a good 6 full OS updates that have to happen to bring your device up to FireOS 5.3.x or later. This can take upwards of an hour and a lot of reboots, but at the end, you’ll have a fully upgraded device.
  • Next, we’re going need to install APK’s that are not ‘blessed’, so you have to tell the Fire to accept them. Go into settings -> Security settings and check the switch that says “Allow third party apps”
  • Download and install a file manager. I used ES-File Explorer, which is very popular, but I’ve seen others say “don’t use this it doesn’t work”. I suspect the ‘not working’ has since been fixed. It’s worked fine on 3 devices so far.
  • Next, pull down the APK’s via the Fire’s Silk Browser. Go to this thread on the XDA Developers forum and click on each of the APK links, and download the files, in order, from top to bottom.
  • Once they’re downloaded, start up the ES File Explorer, and navigate to the Downloads folder. You’ll see 4 APK’s there. Click on the them from RIGHT TO LEFT (which will install the ‘oldest’ one first, and the Play store last.
  • After each of the APK’s is installed, launch the Play store, log in with your Google account, and you are all set.

Now that the Fire can install third party apps via the Play store, all we needed to do is install Eventbrite Manager, and log into it with an access-limited login we created just for this event (we’re going to allow general joe schmoes to check people in, and having access to refunds, people’s personal infromation, etc – didn’t seem like a good idea. So a generic Eventbrite login that ONLY allows for checkins was created, and that’s what we logged the tablets into.

I also picked up a handful of desk mounts with really strong gooseneck stalks. Because we’re going to be scanning receipts via the rear camera, the tablet needs to be held off the desk easily.

And we’re done! The Eventbrite Manager app syncs the attendee list whenever it’s connected to the internet. So we can go ahead and check in people super-fast (with a very satisfying BADEEP whenever a successful scan happens), and not have to rely on hotel internet connectivity (which can be notoriously sketchy). At the end of the day, we have a full record of everyone who has checked in and when.

Know what’s no fun? Smartphone failure while travelling.

Last week I was in California for a big tech summit my employer throws every 2 years. It’s a pretty big deal, with 3 days of presentations, workshops, tech demos, and interesting keynotes. I had a great time, met many of my coworkers I only know through voices on conference calls, and generally learned a ton.

Thursday night I was in the San Francisco offices, getting ready to head to the airport. I had 4 hours until my flight was scheduled to leave, and while in a meeting, I noticed my Moto X Pure (aka ‘Style’) phone reboots itself. “Okay, no worries, probably an update in progress. NBD.”

I went back to my meeting, and glanced at the phone again 10 minutes later. Looked like it was rebooting again. “Hmmm…. shouldn’t do that, but… okay…”

Half an hour later and continuous reboots, I was beginning to get worried. The pattern was the same. Boot, Optimizing apps, starting apps, reboot. Something was definitely wrong.

A little googling found me an article that describes the Moto X doing this sometimes when either an app gets corrupted, or there’s problems in the cache. Using instructions on the net I reset the cache from the bootloader, and let it try to boot again.

Nope, stuck in the loop again.

I was beginning to get very concerned. Traveling without a working phone, to echo a great movie… “Possible… but not recommended!”

In the end, I had to pull the ripcord, and do a full factory reset. Time until getting on the plane? 3 hours, with a half hour drive to the airport. This is the first time I’ve had to wipe and reload my phone from scratch as far as I can remember (we’re going back to Treo days here), at least where that sort of reload didn’t also involve replacing the phone completely.

In the end, it worked. The unit was able to do a factory reset, came up, did a few updates, and was back online with my normal account. It didn’t automatically reinstall all the apps (which I found a bit odd), so I had to manually tell Play to re-install the critical pieces I needed (including the authentication tool I use for work).

I was able to be on the road and mostly operational inside an hour, and made my flight just fine. I’ll credit my rabid use of 1Password for helping me get all my accounts re-connected.

Naturally, there’s still a few things that are out of whack. I spent a year twiddling that install to make the menus line up nicely, or set my backgrounds just so, etc, so post-reload, it sort of feels like a new phone, but really isn’t.

Now I’m on another trip, this time to Utah, and my phone is happily keeping me company. Alas, I’m finding all the little bits I haven’t reinstalled, such as all my local cached music in Spotify – something that would have been helpful on this flight But, that’s something to set up once I’m back in the hotel.

Internet Addiction is Killing Your Photography

There’s a wonderful post over on Petapixel (What? You’re not following them already? Get on that… seriously, they’re awesome, whether you’re a photographer or not)..Un petit coin de paradis...

Wait, what i was saying? Oh, right, the post. The post is about how internet addiction is destroying creativity. The author talks specifically about how it relates to photography, but the general case is true…

What I’m getting at in the headline is that the Internet is most likely the cause of your impotence when it comes to productivity. How many people pick up their smartphones and check something online or in an app in the morning, instead of picking up a camera and capturing a sunrise?

I bet 99% of us look at a smartphone before anything else in the morning. If only your first thought out of bed was “What photo will I capture today?” think about how much more you would achieve.

And he’s absolutely right.

Over the last couple weeks (and through being sick with a head cold the last 5 days), I’ve found myself almost breathlessly refreshing news.google.com and my Feedly page or whatever just to keep up the constant stream of input. And when I felt like doing something, it would have to compete with the information overload I was getting off the net. How can creativity thrive under this kind of mental onslaught?

I’m going to try and change things up. Move politics out of my “must check once an hour” need. Stop refreshing feedly to get the latest DailyWTF. I’m not a big social media wank, so Facebook, Twitter, etc are not my main distractions, so I can’t really put this under “i’m quitting social media for a while”. It’s more “I need to set priorities a little. This is not healthy for me.”

In the past I’ve done little life adjustments like this, and whether they stick long term or not, they do shift the balance a little, and nudging yourself out of a well worn groove isn’t a bad thing, even if it means things are a little shaky until a new smoother path is found.

Soylent’s New Flavors and My Weekend at a Con

This past weekend I made my yearly mecca to Arisia, the big SF / Fantasy convention in Boston. I’ve been going to Arisia for almost 25 years now, sometimes as a staff member, sometimes as a volunteer, but I haven’t missed an event since 1990, so it’s sort of ritual now.

Since making the decision to make Soylent a part of my diet, I’ve waxed and waned on how much I take in. Soylent regularly changes the ‘mix’ in it’s products, so that has impacted this as well.  The original version wasn’t particularly exciting, but did fill my belly.

A few weeks ago, Soylent announced 2 new flavors for their ‘2.0’ premixed drink. I’ve been enjoying the premix bottles for 6 months already, and the opportunity to have some new flavors for Arisia seemed like a great plan.  I’d tried the ‘coffiest’ flavor, but wasn’t impressed (I like my coffee super-sweet, and coffiest was bitterer than I like).

Soylent "ready to drink" food bottles, in all 4 flavors
Soylent “ready to drink” food bottles, in all 4 flavors

I ordered 2 case (one of Cacao and one of Nectar – 12 bottles each), and they arrived in time for the con. My plan was to cover half my food intake for the event just via Soylent.

Here’s my take on the new flavors. Note that nutritionally, these are no different than the stock 2.0 bottles. They’re just flavored.

  • Nectar – A subtle taste change. My partner thinks it tastes like rose water – a slightly sweet, flowery taste. Better than the stock 2.0 flavor (which is somewhat like a think vanilla shake), but not “MMMM, this is GREAT!”.
  • Cacao – This may turn into my new favorite drink. It has a rich chocolate taste – essentially a bottle of thick chocolate milk. I’m still trying to get past feeling guilty about chugging down a small chocolate milkshake, but this is one heck of a lot better for me than a Five Guys shake (and still only 400 calories).  The trick is thinking of these as ‘food’.  So not something I’m going to have WITH a burger, but INSTEAD of a burger.

Traditionally, keeping well fed at a convention is a challenge.  Hotel food tends to be expensive, and taking time out in the middle of an event to go get a meal can be frustrating.  It’s easy to fall back on cheetos and Dr Pepper, which does no one any good.  Having what amounts to the caloric equivalent of a Subway sandwich at hand, and requiring only the time it takes to chug down the bottle (I drink mine all at once) is pretty awesome.

I think the only thing we noticed is that you have to think of the Soylent bottles as food.  NOT drink.  Both of us found we needed lots of water or similar even though we had just downed 12oz of liquid.

Overall though, it was an excellent experience.  We stayed fed, it was tasty, and we didn’t need to spend major bucks on buying food, or making a mess mixing our own powders (like you do with Soylent 1.x). Highly recommended!

What I Did on my Winter Vacation.

My employer does a ‘shutdown’ twice a year; once over Christmas break, and once around July 4th. This year has been great schedule wise because of what days Christmas and New Years fall on, so there’s a lot of free time.

I decided that it was time to move forward on a project I’ve been thinking about for months. Building a workbench in my office. The goal is to be able to work on electronics, drones, and other stuff without crufting up the kitchen table.

I live in a relatively small 2br house. By US standards, it’s very small (about 900sq ft). Since I’m working from home full time, I’ve been using the second bedroom as an office – it had previously been set up as a guest / kid sleeping room with a loft bed that’s out of the way when I’m officing. I decided to use a similar design approach to building out the workbench. The room is only 11’x7′, so fitting in a spare bed, my standup desk, a workbench, bookshelves, and some storage required some creative thinking.

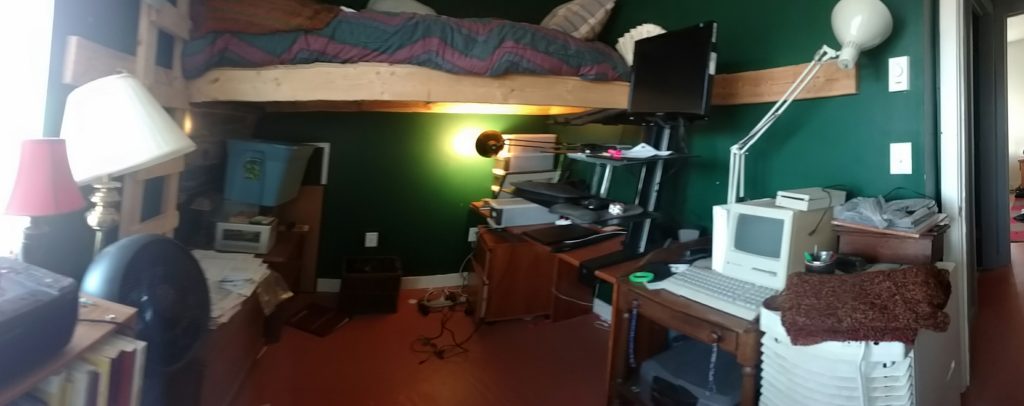
My office before I started work on the new desk.
Office before work started on the new desk.

The first step natch was clearing out my working desk and hardware so I had space to work. Fortunately I keep my bedroom pretty clutter free, so it was just a matter of moving things down the hall. Then construction began.

I used a similar design to the loft bed, just not quite as hefty. On the loft I used 2×6 boards, but for the desk, I just used 2×4’s. Using a magnetic stud locator, I found the wooden studs in the walls, cut the boards to length, and used 3.5″ deck screws to attach the supporting studs to the walls. I guess the best term for these are ledger boards, since they’ll be supporting the ends of the joists. Anyway, the idea is the desk it attached directly to the wall studs, so no legs needed. It’s custom fit to the room.

Halfway through the build

Once the ledger boards were screwed in place (14 screws went in, and I hit the studs on every try. Booyah), I used aluminum hangers to put the joists in. These attached directly to the ledger boards and gave good support to the 2×4’s under the surface of the desk. I had to be careful about spacing due to where the ledger boards were attached to the studs. I needed at least 2 2×4’s under each ‘slice’ of 18″ plywood to support it cleanly.

Once all the joists and ledger boards were done, I laid down 2 strips of sanded plywood, and screwed them down with normal 2″ drywall screws. These are not load bearing, so using the weaker screws was fine – it was just to keep the boards flat and not move around.

The finished project

The last touch was adding a kickboard around the top of the desk so things weren’t banging against the painted walls. I also drilled 3 2″ holes in the back of the surface to allow power cords to come up for equipment.

Heightwise, it’s 29″, which matches the older wooden desk I have. I’ll be able to put a plate in to join the two surfaces (I left a 3″ lip under the front)

Some quick lessons learned…

  • Magnetic Stud Finder – I can’t recommend these things enough. They’re dirt simple, inexpensive, and work great for finding nails in walls. Just a big powerful magnet.
  • LED Worklight – I have a set of old halogen lights roughly the same size. I won’t be using them anymore, as these LED lights are very bright, use much less power, and aren’t nearly as hot / dangerous. Really useful to have around.
  • I still love my Ryobi One+ power tools. They’re aging to be sure, and I’ll be replacing my battery packs from NiCd to Li-Ion shortly. I’ve already upgraded the basic drill/driver from the old yellow tool to the new green one, but I’m still using the older jigsaw and circular saw, which were wonderful for this project.

I’ve already used it to work on some home automation equipment, and it’s the right height, setting, and size to make things totally comfortable and useful. I’m looking forward to ramping my projects up again!

What I’m Doing as the World Changes

Given the inevitable dramatic shift to the right that is about to happen in the US government and the associated chaos in the wider social / political circles, I, like many others, feel helpless and adrift. My vote did not help defeat the self-identified anti-truth bigot now on his way to the white house. Now that the elections are over, there’s little I can do directly to prevent him from taking the most powerful office in the world. But while I can’t take power from him directly, what I can do is throw support to his enemies – the voices of reason, logic, civil liberties, and common sense.

Anil Dash has a great article on this :

“Don’t waste a single moment listening to the hand-wringing of the pundit class about Why This Happened, or people on TV talking about What This Means. The most important thing is that we focus on the work that needs to be done now. While so many have been doing what it takes to protect the marginalized and to make society more just, we must increase our urgency on those efforts, even while we grieve over this formidable defeat.”

I am not one of the fat cats who are overjoyed at this turn of events, though I am better off than many, particularly those who are going to be impacted directly by upcoming policy changes and direct action in the next few years. I’ve chosen to donate heavily… give to support those organizations who will carry the fight forward.

To that end, this is a list of the people I’ve chosen to support. I’ve set up monthly repeating donations – I feel that sort of regular, dependable revenue is important

  • Wikipedia – because accurate, globally available information should be a basic human right.
  • NPR – One of the few reliable, unbiased, professional reporting services left in the world
  • EFF – An effective voice in the digital landscape for digital freedoms
  • ACLU – Don’t really need to give reasons here, do i?
  • FeedingAmerica – A very good organization that supports food banks
  • Southern Poverty Law Center – A voice against racism and hate groups

Are there those I’m missing you think I should support? Please comment and let me know.

Edit I’ve added NARAL and Planned Parenthood to the list. Thanks for the recommendations.

Daves Picks : Best Portable Headphones – Brainwavz Delta IEM

I’m going to start sharing some of the things I’ve found on the net that are exceptional finds, buys, whatever. There’s so much crap out there, sometimes it’s hard to find the true gems.

A bit ago I started looking to replace my wired headphones. The requirements were pretty rough:

  • Inexpensive (< $50 would be best)
  • Durable
  • Comfortable
  • Good for long term wear (talking several hours here)
  • Excellent audio range.
  • Doesn’t look like ass

Simple, right? Uh huh.

After going through a couple el cheapo versions (which, I have to admit, told me how BAD headphones could be), and playing with some super-expensive ones (which… were good, but not as comfortable or durable as I had hoped), I started reading reviews for the Brainwavz Delta IEM Noise Isolating Headphones (say that 5 times fast!), and started to get interested.

Brainwavz Delta Red IEM Noise Cancelling Headphones

The price tag certainly is attractive. Brainwavz has ones with remote for $19, but could something that inexpensive really be any good?

I’m here to tell you – they are. Easily one of the top 5 headphones I’ve ever owned, they’re rock solid in their build, come with a tough zippered carrying case to hold the headphones and the spare silicon earpieces, and sound magnificent. They have excellent range – the highs and lows are crisp and strong across all volumes. The cord is long enough that even plugged into my laptop, it doesn’t get tangled. And they are COMFORTABLE. I can (and have) worn them for 3-4 hours at a stretch and I don’t get sore ear canals or other discomfort. Volume wise, they can keep up with me just fine… I don’t feel like at low levels I have to crank them to hear the full range of what I’m listening to, and when I really want to blast things out, they step up to the task just fine!

So, if you’re looking for affordable, top quality ear buds, I can say with some confidence the Brainwavz Delta IEM headphones will do well by you!